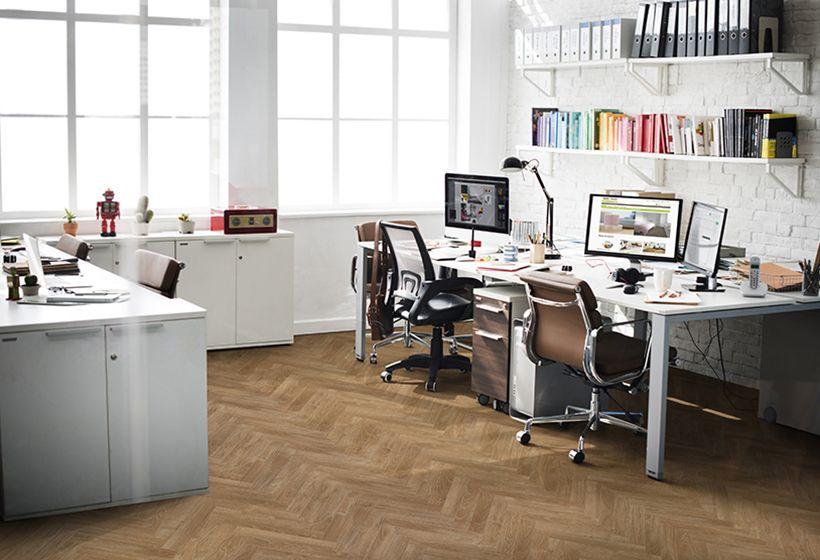
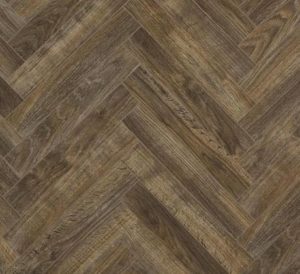
Chateau Parquet Laminate Flooring by Berry Alloc is one of the best parquet laminate floors on the market. It is hard wearing and has an easy installation system which makes it perfect for DIY. If you are looking to install this yourself please read through our installation instruction guide. Remember to decide which pattern you would like as they can be installed in different ways:
- Traditional Herringbone Parquet
- Shipdeck Straight Plank
- Ladder Pattern
- Mosaic Pattern
CHATEAU INSTALLATION GUIDE
Follow this to obtain manufacturers guarantee
The CHATEAU laminate floor is designed for:
- Heavy domestic use such as in bedrooms, living rooms, kitchens and entrances
- General commercial use such as in classrooms, small offices, hotels, boutiques
Chateau is a unique laminate that can be installed in multiple patterns due to the exclusive Chateau locking system developed by BerryAlloc engineers.
Choosing The Correct Planks
The ‘herringbone’ and ‘mosaic’ pattern requires 2 plank types: A-planks and B-planks. These are packed separately, so do not forget to mention to your BerryAlloc dealer that you need both types if you choose this pattern.
The ‘shipdeck’ and ‘ladder’ pattern only require 1 plank type: the A-planks.
For a perfect result that fulfills the warranty conditions, we advise that you follow the below mentioned installation instructions carefully.
1. Planning Your Installation
It is important to store the laminate boxes at room temperature for at least 48 hours before the installation. However, you want to avoid them having contact with the air so keep the packs sealed and try to stack them in a way that minimises contact with the air. For example, stack them on top of each other. The floor should be stored for at least 48 hours at a room temperature of 18-22°C and a relative humidity of 40-50%, and then installed under the same conditions.
Required Tools
- Electrical or hand saw
- Spacers
- Measuring tool and pencil, T-square
For your safety, use protective clothing including gloves, a dust mask and protective glasses.
Do not forget the matching skirtings and finishing profiles (doorways, transitions to other floors) and a suitable BerryAlloc underlay or moisture barrier depending on the situation (not for glued installations or Ladder and Mosaic).
Chateau in the ‘herringbone’ and ‘shipdeck’ pattern should be installed as a floating floor which means that the floor should be able to move.
To install a floating floor:
- Do not screw or glue the floorboards to the subfloor.
- Do not install laminate floor under fixed constructions such as kitchen
- Cabinets or built-in closets
- Leave a 8-10mm expansion gap to walls and other fixed constructions so that the flooring can move.
- Always install expansion profiles in doorways.
- In areas which do not join symmetrically, and when the room length/width exceeds 10m, install expansion profiles.
2. Preparing the Subfloor
BerryAlloc laminate can be installed on most hard subfloors, e.g. chip/plasterboards, PVC or concrete. Although you must be sure that the existing subfloor construction is fixed.
The subfloor must be totally dry:
- Wooden and wood based material: max. 50% relative humidity
- Concrete and light concrete floor: max. 2,0 CM% (1,8 CM% if floor heating)
- Plaster and plaster based floor: max. 0,5 CM% (0,3 CM% if floor heating)
The subfloor has to be even (max. height difference of 4mm per 2m). Sharp edges must smoothened and holes filled. This is important because an uneven subfloor can cause squeaking noises.
Any soft material, like a wall-to-wall carpet, needs to be removed.
Clean the subfloor before you start the installation.
On an existing wooden floor, BerryAlloc laminate should be installed across the old floorboards.
3. Underlay
If you have a subfloor heating system, be sure to read our separate manual for installing laminate on top of underfloor heating.
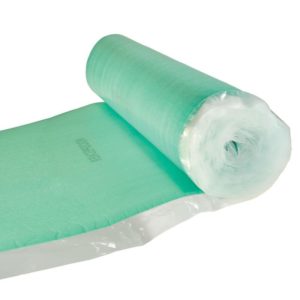
We recommend that you install your laminate with a BerryAlloc underlay that suits your situation. Different underlays have different properties including reducing footfall noise, being compatible with underfloor heating and improving heat insulation.
BerryAlloc underlays are specially developed to be suitable for BerryAlloc floors, and with the same high quality standards, to ensure a perfect result. Please check our underlay guide for more info.
For ‘ladder’ and ‘mosaic’ installations, we recommend you glue the laminate to the floor, therefore no underlay is needed.
4. Installing Your Chateau Floor
Check all planks for visible defects in good light conditions, both before and during installation. Planks with defects must not be used as this will affect the quality and longevity of your final floor.
For the most natural floor pattern, make sure you mix the designs of the planks across the floor.
Manual Chateau is a dream floor for creative installers. Multiple patterns are possible, and a wide variety of colors allows you to mix and match, and add some personality to your royal floor with herringbone, shipdeck, ladder and mosaic patterns.
4.1 THE HERRINGBONE PATTERN
For the herringbone pattern, you need 2 plank types: A-planks and B-planks. When you take a plank and turn the long side groove side towards you, the groove continues on the RIGHT side for the A-planks and on the LEFT side for the B-planks. Always make sure the grooves are pointing towards the laying direction.
All planks are marked with ‘A’ or ‘B’ in the backprint.
Consider the shape of your room when you choose your start wall. For L- or U-shaped rooms, please check the drawings in the manual that comes with your floor for guidance.
Start by laying a row of A-planks at 45° and then connect them with B-planks to finish the first row.
Consider the expansion gap at the sides when measuring the size of the last plank in the row.
If using a hand saw, cut on the pattern side. If using an electrical jigsaw, always cut on the back side of the plank. A sharp saw blade is a must for the best result!
Continue with a row of A-planks and then a row of B-planks, until you have at least 4 rows.
At this point, shift the installed floor towards the starting wall and draw a straight cutting line across the whole row, parallel to the wall.
Now you have 2 options:
- Put numbers on the planks before you unlock them and cut each plank separately. Then put them back in the right order against the wall.
- Alternatively, use tape to keep the planks together on both sides of the cutting line.
Put blocks under the row to lift the planks and cut them. Shift the floor against the wall.
Continue with the installation row per row: a series of A-planks and then a series of B-planks.
In the last row, you will have to cut the planks again. Measure the distance from the wall to the corner of the plank, where the laminate design ends – and don’t forget to consider the expansion gap!
Take a plank and put it in the right direction (groove side towards the end wall). Mark the distance you have measured, and draw a line in a 45° angle. Cut the plank and install it. We advise that you use glue on the grooves of very small pieces to keep them secure.
You can also install a double herringbone pattern in the same way.
4.2 THE SHIPDECK PATTERN
If you choose the shipdeck pattern, you only need to use A planks. Put the first plank in the corner of the room with groove side pointing towards the direction of the installation. Apply glue to the short side of every plank before you install it.
Make sure the joints of the planks are staggered by 1/3 of their length.
4.3 THE LADDER PATTERN
Chateau can also be installed as a ladder pattern, but has to be fully glued to the subfloor. This means no underlay can be used and no expansion gaps are needed: the floor is fixed.
Choose a high quality parquet glue for the best result.
For this pattern, you only need A-planks. Carefully spread the glue on the subfloor and place a plank in the corner with the groove pointing towards you. Start with a first row against the wall and then continue with the ladder ‘steps’ in the opposite direction, groove pointing towards the laying direction.
4.4 THE MOSAIC PATTERN
For the classic mosaic pattern, you need both plank types, A and B. This pattern is fully glued to the subfloor so no underlay or expansion gaps are necessary.
Spread the glue and start with an A-plank, with the groove pointing towards the laying direction. Install 6 A-planks. Then switch the direction and continue with the 6 B-planks, groove always pointing in the laying direction. Continue this fully glued installation square by square, row by row, until complete.
5. Door Frames and Heating Pipes
Wooden door frames should be shortened enough to make a plank and underlay fit underneath. Lay a panel face down next to the door frame.
Saw the panel, then slide the plank under the door-frame. Keep an expansion gap under the door frame of 8-10mm.
If you have heating pipes, measure their exact position and mark it on the laminate. Add 20mm to the dimension of the pipe, because the laminate has to be able to move in all directions around the pipe. Saw from the drilling holes to the side of the laminate at an angle of 45° and put the laminate in place.
When installing accessories, always keep in mind that the floor has to be able to move. This means:
- Skirtings should never be attached to the floor, they can be fixed to the wall with clips or, in case your walls are not straight, use the BerryAlloc glue to fix the skirting to the wall.
- After you have installed a skirting or profile, do not seal/fix it to the laminate with sealant. The movement of the laminate will cause cracks in the sealing product which makes the sealant ineffective and unaesthetic.
Joints on fixed building elements (door frames, heating pipes, etc.) should never be completely sealed with elastic filler. Use a Fillertwine first and then finish with elastic filler, this allows the floor to move. - Profiles, doorstops and suchlike should not be screwed through the laminate into the subfloor.
6. Care and Maintenance
It’s vital a laminate floor is cared for and maintained after an installation to ensure it stays looking good for many years to come.
A laminate floor is very easy to clean. There are two options.
- Dry cleaning with a brush, then mop with dry wipes or use a vacuum cleaner
- Wet cleaning with a well wrung-out cloth – avoid using too much water!
Be sure to clean up any spilled liquids immediately to prevent them damaging the floor.
We strongly recommend that you use the BerryAlloc laminate cleaner. It’s specially developed to clean our laminate floors and leaves no traces, helping to maintain the quality of your floor for years.
Never use steam cleaners on laminate as these will damage the floor.
Put doormats at every entrance to protect your laminate from dirt and sand which could scratch the surface.
Lift heavy furniture (rather than dragging) and put felt pads on the legs of your chair. Use a protective floor mat under any castor chairs. This will help to prevent scratches or other damage, keeping your floor in a good condition.
Laminate can not be polished or treated with products that contain wax or oil. For more details, read our care and maintenance manual.
Enjoy your Berry Alloc Parquet Laminate Flooring!
For help or information call us on 01283547528